
How to perform the Lateral Head Roll test
The Lateral Head Roll test is part of the VORTEQ™ Assessment bundle. The Lateral Head Roll test is performed to identify horizontal canal BPPV and has additional features that provide significant improvements over the standard positional tests:
- 3D head model guide to show the head position of the patient in real-time and during playback.
- Guide to assist in proper head placement with exact degree of head positioning.
- Torsion eye graph.
- Pause during roll right and roll left to ensure clean data collection.
- Automatic test start (optional).
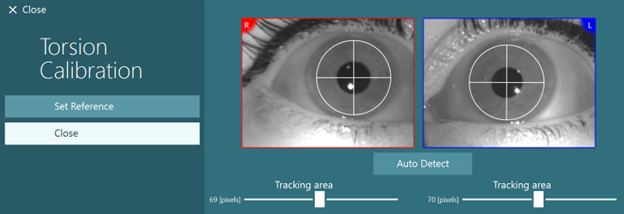
Calibration
If you have not previously calibrated your eyes, you must do that first. It is also required to calibrate for torsion prior to this test.
Performing the test
Select the Lateral Head Roll test from your test menu.
Once the system is calibrated, you are ready to begin testing. You will use the 3D head model to guide you through the appropriate head/body positions for the test. Make sure the VORTEQ IMU is attached to the goggles and turned on. The test is performed with the patient supine (laying down).
Step 1 is to turn the patient’s head 45 degrees toward the right.
Step 2 is to turn the patient’s head 45 degrees toward the left.
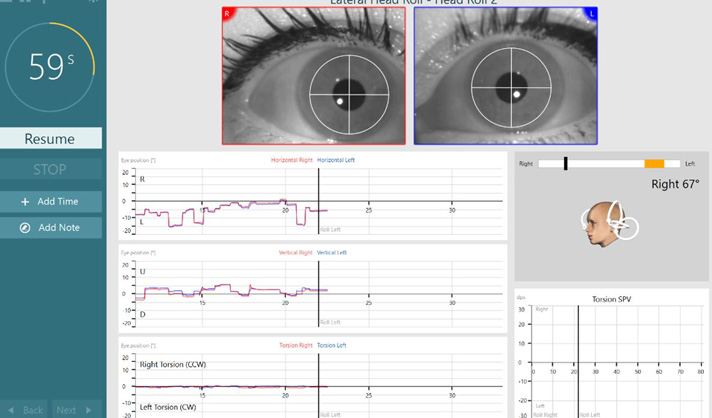
The black bar represents the head movement, and when the head is in the correct position, the shaded area will turn green, and you will see a degree of head position. Once you have reached the first position, you can record for a minimum of 20 seconds, then press continue.
In between head roll right and left positions, there is a pause to allow the patient to get in the proper next position without adding noisy data to the recording.
Here you see that just after head right was completed, the data collection paused to allow for the patient to get into the head left position. You can click ‘Resume’ when the patient is in the proper head position and continue data collection (Figure 2).
Results
When you have completed the test, you will see a summary screen with bar graphs representing any nystagmus that was generated during the maneuver (Figure 3). Any nystagmus greater than 6 degrees per second will be shown highlighted in grey and represents an abnormal finding.
There is a torsional eye movements graph that is also present at the bottom of the screen. Horizontal canal BPPV should not result in torsional eye movements, so this can help with diagnostic accuracy. There is also a graph in the lower right corner that measures the slow phase velocity (SPV) of the eye tracing.

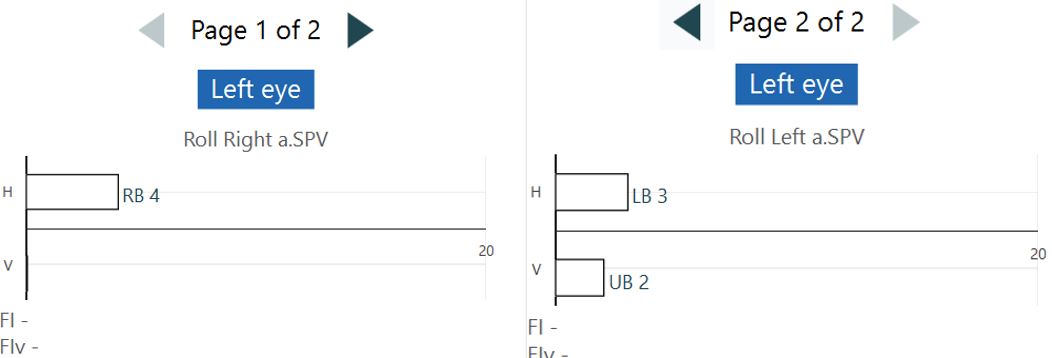
As there are two different sections of the test (head roll right and head roll left), the nystagmus is measured for each of these sections. On the summary screen, you can scroll between page 1 and page 2 of the data to view any measured nystagmus from these sections (Figure 4).
Test parameters
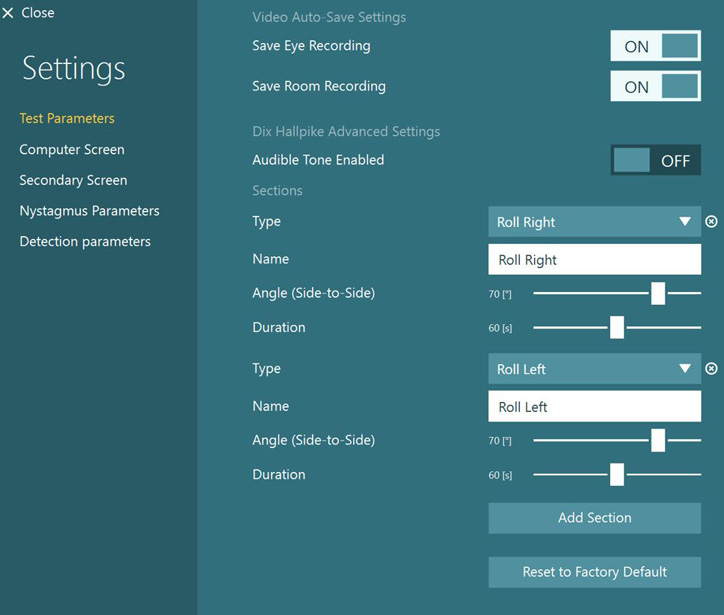
Under Protocol Management > Lateral Head Roll > Test Parameters, you have the ability to edit the order, amount, target angle, and duration of test sections (Figure 5).
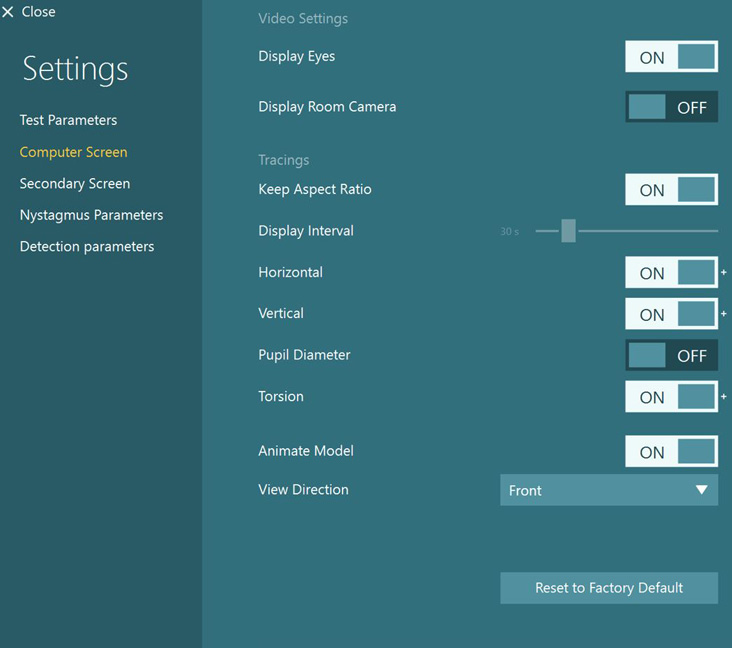
Computer Screen customization
Under Protocol Management > Lateral Head Roll > Computer Screen, you can edit various video and tracing settings (Figure 6).
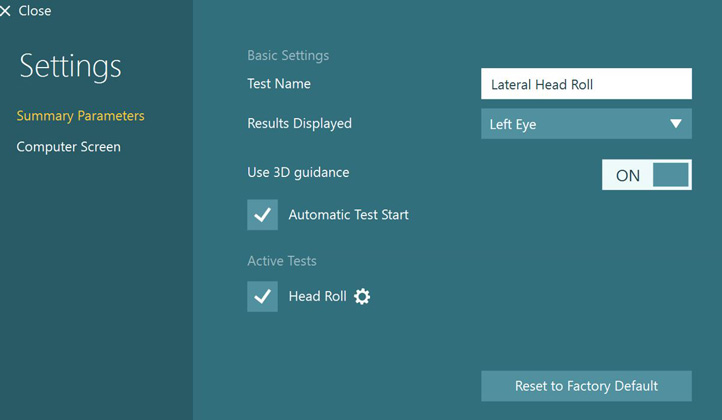
Optional feature: Automatic Test Start
Automatic Test Start is an optional feature you can enable for a time-saving aspect of your protocol and appointment. This means that the test will automatically begin a couple of seconds after the patient is in the correct position (as represented by the head model and green target bar).
To turn on this feature, go to Protocol Management > Lateral Head Roll.
For further assistance, please refer to the Instructions for Use and Additional Information manuals.
Presenter
