
How to perform the Functional Vision Head Impulse Test (fvHIT™)
In this quick guide, you will learn how to perform the Functional Vision Head Impulse Test (fvHIT), which provides functional information about how clearly the patient sees in response to quick head impulses and is similar in technique to the Video Head Impulse Test (vHIT).
Computer setup
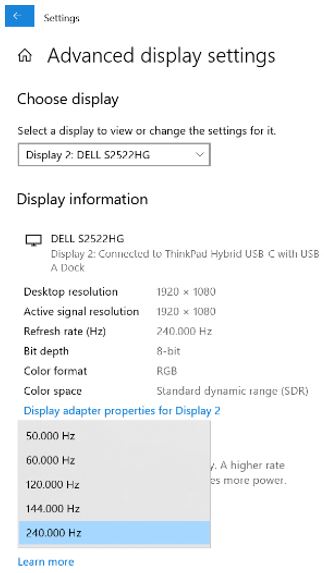
A high-speed monitor (240 Hz) is recommended to ensure the most accurate optotype display time at the peak of the head impulse. Whether you have a high-speed monitor or not, you may still have the ability to adjust the refresh speed rate for your stimuli display. Go to computer display settings and advanced display settings. Choose the highest refresh speed rate you have for your stimuli.
Screen setup
Select the Optotype Stimuli display source and set the screen size and patient distance in the System Default Settings before beginning the first test. A suggested patient distance will be identified for your screen dimensions.
If the distance is too much for your room set up, then choose a smaller display input. It is suggested to consider utilizing a smaller monitor than your oculomotor screen for optotype tests (DVA, GST, fvHIT).

Protocol setup
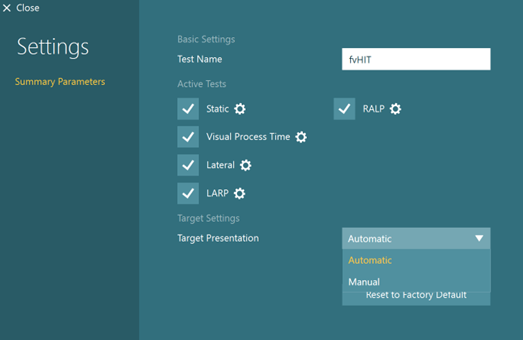
The default protocol is automatic, but you can also choose a manual target presentation for the Static Visual Acuity and Visual Processing Time tests in the fvHIT protocol. You can choose the options in Summary Parameters.
Preparing for the test
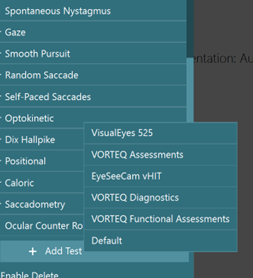
While in a test session with a patient, you can select fvHIT from your default, VORTEQ™ Assessments, or VORTEQ Functional Assessments protocols if you have not done so already.
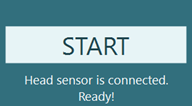
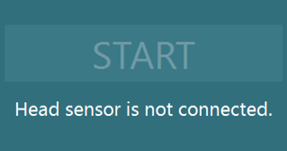
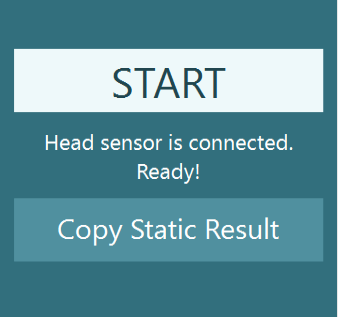
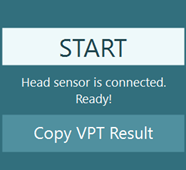
Make sure you have attached the VORTEQ sensor to the headband and turned it on. Below the start button, you should see “Head Sensor is connected. Ready!” before pressing start.
If the IMU is not turned on, you will see this error message.
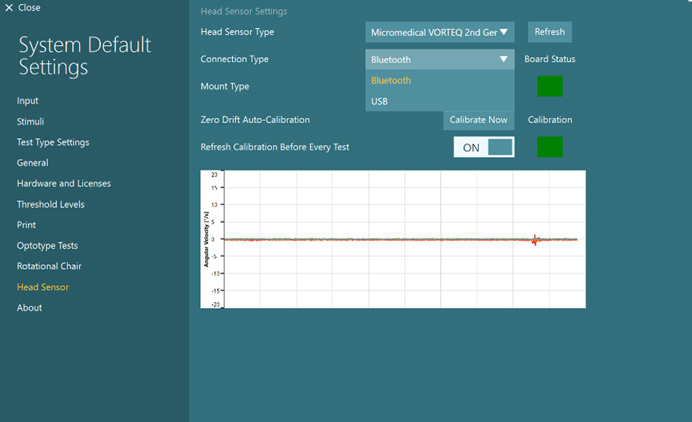
If your head sensor is on but still not connected, you can check System Default Settings, Head Sensor to make sure the Connection Type (Bluetooth, USB) matches what you are using.
Once you have mounted the headband on the patient, you can hand them the remote control. Instruct the patient to press the arrow that matches the direction of the optotype they see during the testing.
As the clinician, you can also use the keyboard shortcut arrow keys or touch the software to select the direction of the optotype.
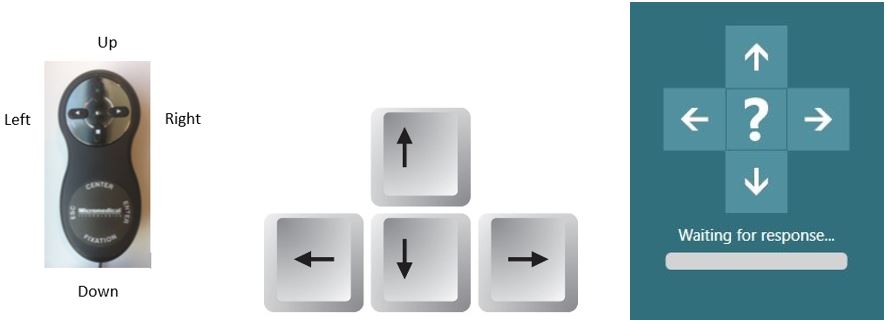
If the patient does not know the direction, they can tell you “I don’t know” and then you can click on the “?” on the screen to enter the “I don’t know” response for them.
There is also a five second timer (labeled “waiting for response”). If no optotype response is selected in 5 seconds, the “I don’t know” is automatically chosen. The user can also press the spacebar on the keyboard to enter an “I don’t know” response.

How to perform the Static Visual Acuity (SVA) test
The Static Visual Acuity (SVA) test assesses the smallest optotype the patient can clearly see when their head is stable. For the test, you will instruct the patient to tell you which way the open part of the U optotype is facing (left, right, up, down, or I don’t know). The test will complete a thresholding process to find the smallest optotype the patient can correctly identify twice.
If you have not already completed the SVA test, then you must complete it before moving on to the other subtests. If you have already completed the SVA in the DVA or GST test, then you can copy the values over to the fvHIT.
How to perform the Visual Processing Time (VPT) test
Following the SVA test, you will be prompted to complete the Visual Processing Time (VPT) test. This test presents the optotype two lines above the static acuity number and varies the time that the stimulus flashes on the screen. As the patient gets correct responses, the stimulus flash time will get progressively shorter.
If you have already performed the VPT test in the DVA or GST, you can copy the values over and begin fvHIT with the first subtest.
The lowest VPT result is 30 ms. Any response over 70 ms is considered an invalid response and any following results should be interpreted with caution.
If the patient cannot identify the optotype correctly in less than 70 ms, you will see the following warning message.

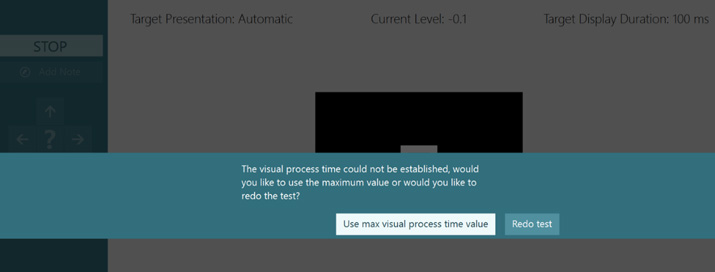
If the patient cannot identify the optotype correctly in less than 100 ms, you will see the following message warning you to either redo the test or use the max visual processing time value (100 ms). It is recommended that you proceed cautiously, as test results over 70 ms may not be valid.
How to perform the fvHIT
fvHIT testing is composed of 5 discrete subtests:
- SVA
- VPT
- Lateral
- LARP
- RALP
After completing SVA and VPT, you are ready to begin fvHIT testing.
The test procedure for fvHIT should be identical to vHIT testing with randomized quick head impulses. Firmly grasp the patient’s head (avoiding the headband) and thrust the head in appropriate direction and canal plane. It is recommended to get at least 30 impulses in each direction, at a variety of head speeds/accelerations.
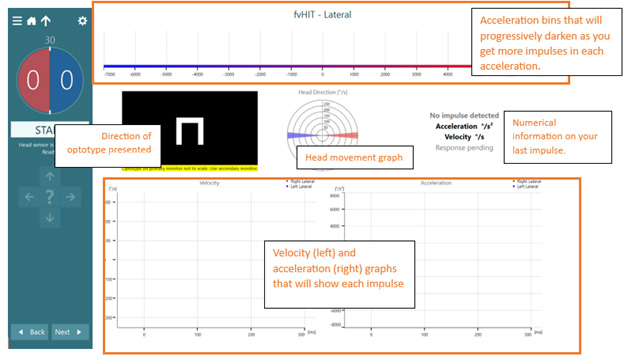
The test screen is composed of a variety of indicators to assist you during testing:
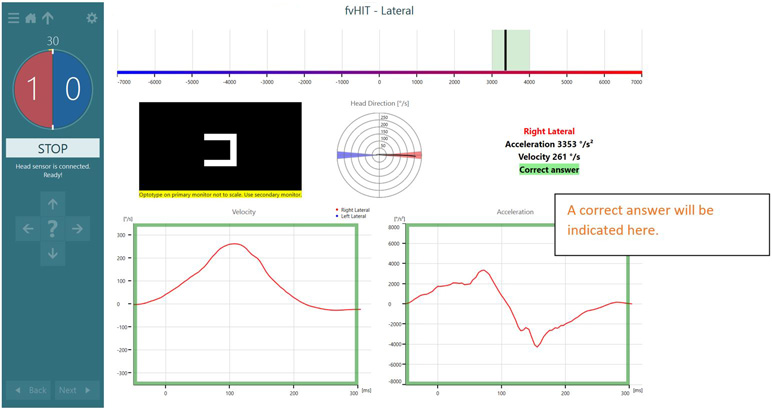
After one head impulse, the screen will look like this:
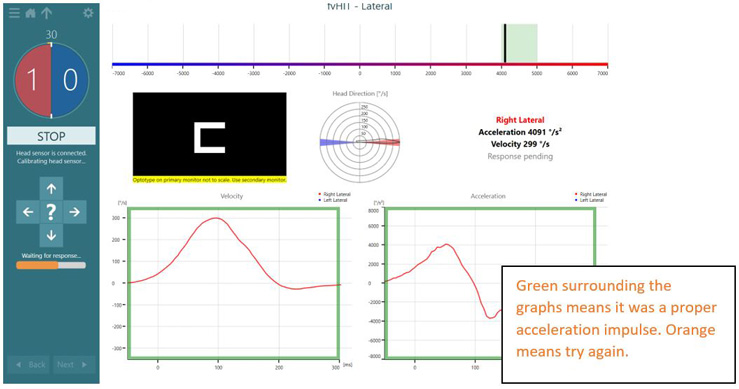
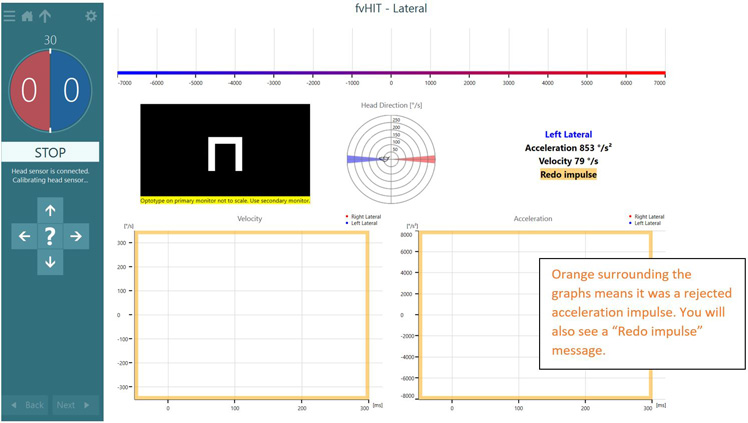
If the velocity of the head movement is too slow or too fast, you will see an orange bar surrounding the head impulse graphs and see the “Redo impulse” message.
After each impulse, you will have your patient respond with which way the optotype was facing. You will be able to see if the answer was correct or incorrect.
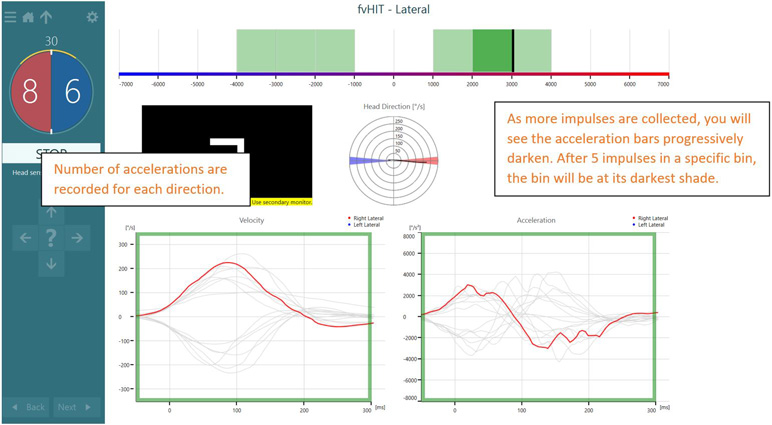
As you continue to increase the number of head impulses, you will see the counter on the left increase in number and you’ll also see the acceleration bins get progressively darker. As the bins get darker, you should focus on other acceleration bins.
fvHIT results
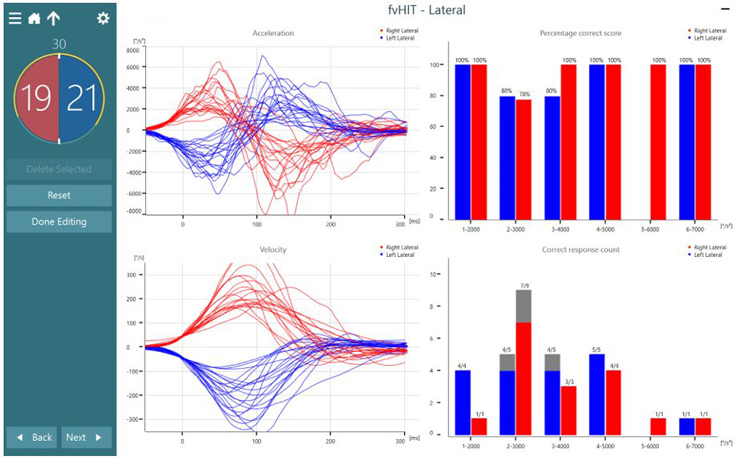
Following completion of one canal plane, you will see the following summary screen (Figure 21). Acceleration and velocity graphs show raw tracings of each head movement. On the right, you see two bar graphs, one that represents the percentage correct score for each acceleration bin and one that shows the number of correct responses versus total responses collected.
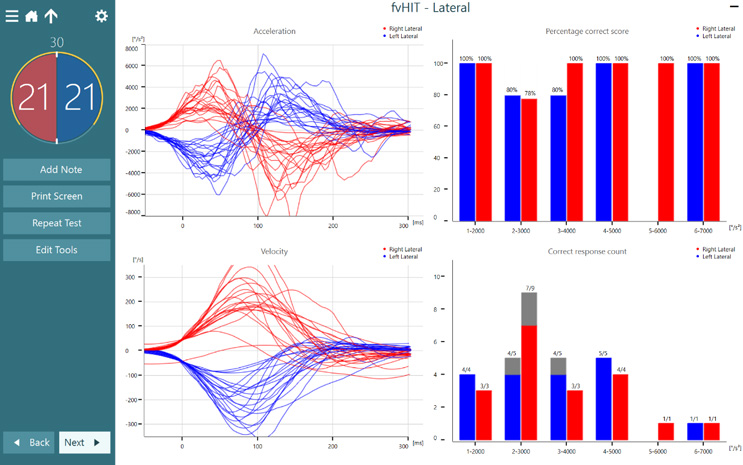
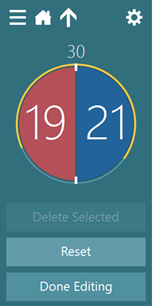
If there are any artifacts, you can select edit tools, select the trace or traces you want to remove, and click delete. The selected trace will be highlighted on the velocity and acceleration graphs, as well as the bins on the right.
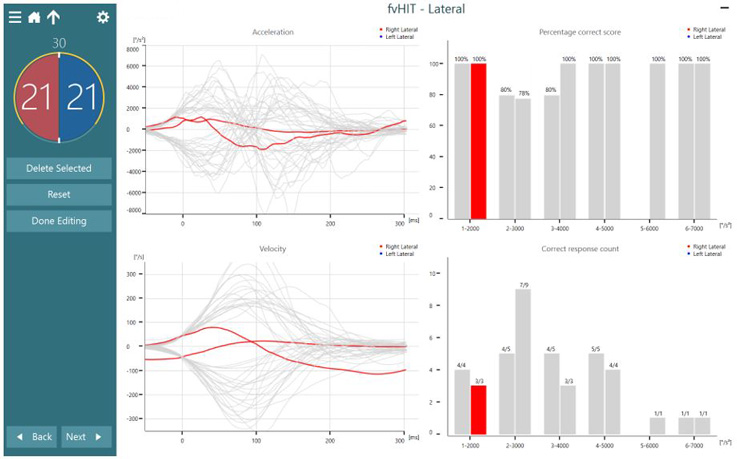
You always have the ability to press “reset” if you would like to undo any edits or deleted traces.
If you have completed multiple runs in the same canal plane, you have the option of which test you would like to display on the summary screen by selecting the black arrow by the appropriate canal plane name.
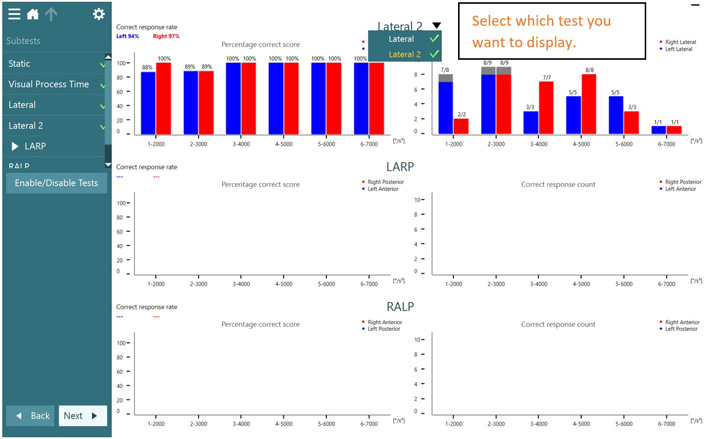
Following completion of all planes tested, you will see this summary. On the left side of each plane tested will be an average correct response rate for you to have a pulse on how well the patient did in each plane.
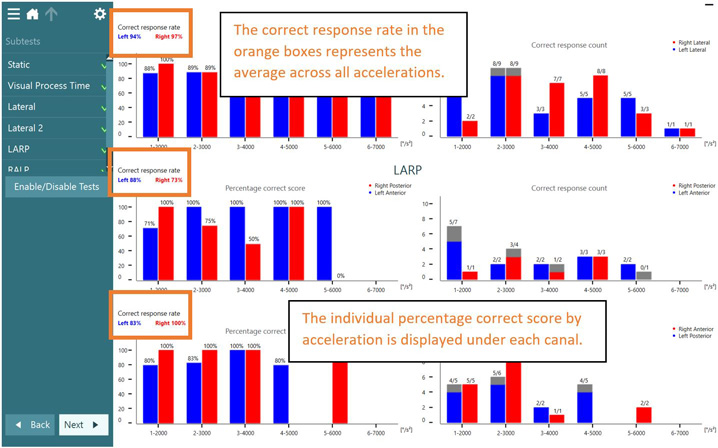
Figure 26: Test summary screen. The correct response rate for rightward and leftward is displayed on the left of the fvHIT summary screen.
Presenter
