
How to Perform the Unilateral Stance Assessment Module
This quick guide provides information on how to perform the Unilateral Stance assessment module on the Virtualis StaticVR and MotionVR solutions. For additional information, please reference the Unilateral Stance user manual.
Equipment needed
To view equipment needed, click on the “i” icon in the upper right corner of the module. To perform the Unilateral Stance assessment module, you will need the static or dynamic force plate. The VR headset is optional.
Patient setup
For standardization of the assessment, it is recommended to position the patient as follows:
- StaticVR: center the patient’s feet on the force plate. The medial malleolus of each foot should be centered directly over the center horizontal (wide) line on the force plates.
- MotionVR: center the patient’s feet on the force plate. The medial malleolus of each foot should be centered directly over the center horizontal (wide) line on the force plates. The outer edge of the foot should be aligned with the antero-posterior line corresponding to the patient’s height (inner line: <55 inches (<1.4 meters), middle line: 56 – 65 inches (1.4 – 1.65 meters), outer line: >65 inches (>1.65 meters)).
- The patient should place their hands on their waist.
1. Open a patient profile.
2. Click on “Start a session” to access the module list.
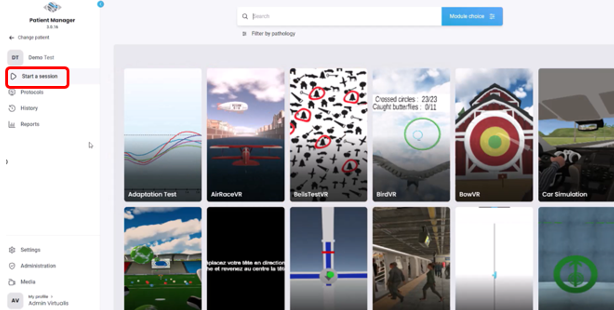
3. Type “Unilateral Stance” in the search bar. The first three letters are often enough.
4. Click on the Unilateral Stance button to launch the module.
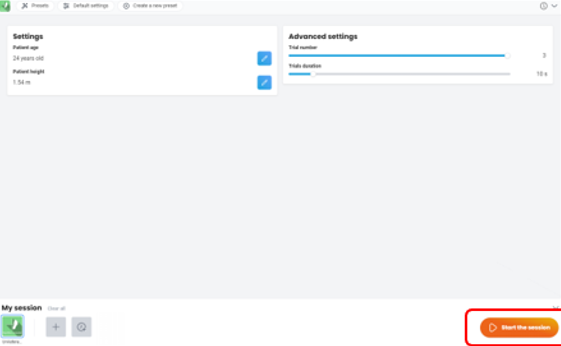
5. Select the intended settings. Note: for standardized performance of this assessment, it is recommended to keep the default settings.
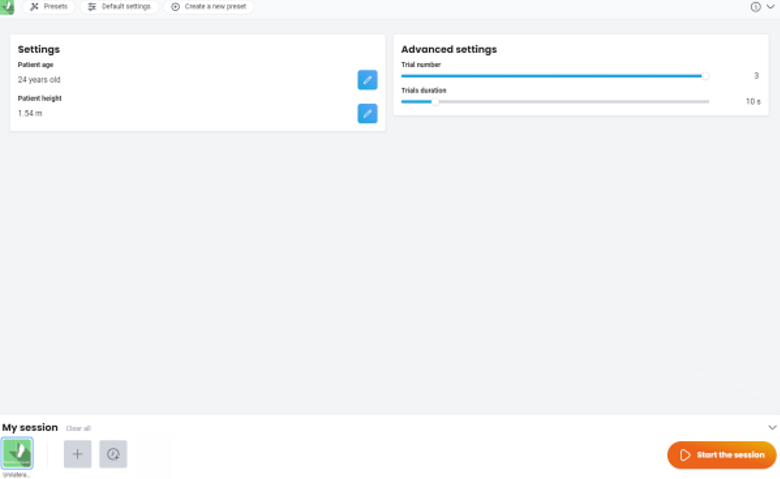
6. Once the settings have been finalized, click on “Start the session”.
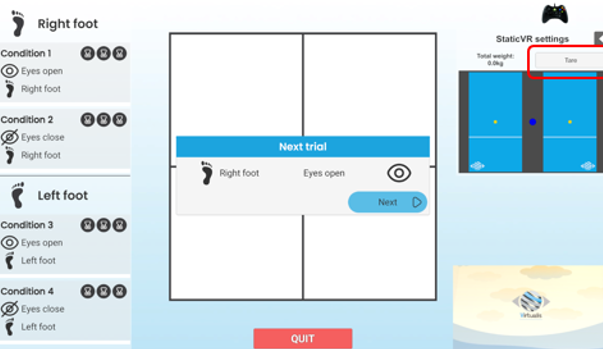
7. Before the patient steps on the force plate, click “Tare.” This will set the weight on the force plates to zero.
8. Assist the patient on the force plates and position their feet according to the patient setup instructions listed above.
9. If using the VR headset, fit them on patient’s head. Have patient look forward and press “C” on the keyboard to center the image in the VR headset.
10. Instruct the patient that you will count down from three and once you say one, they should lift their left foot by bending their knee backwards without it being in contact with the supporting leg and try to hold for 10 seconds.
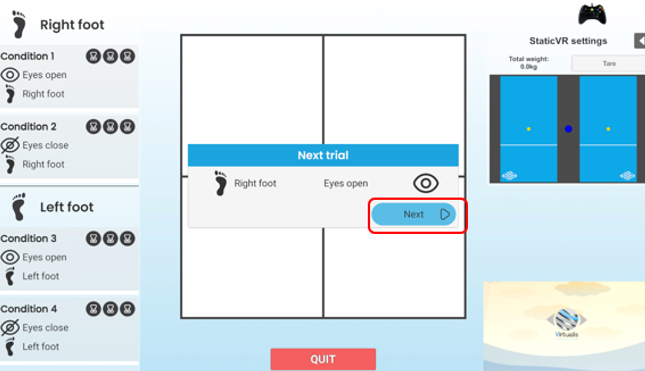
11. Once ready to begin the assessment, click on “Next.” The assessment will begin with unilateral stance on the right, eyes open.
12. Count down from 3 for your patient as shown on the clinician screen.
13. You can view real time sway tracing feedback in the middle section of the clinician screen.
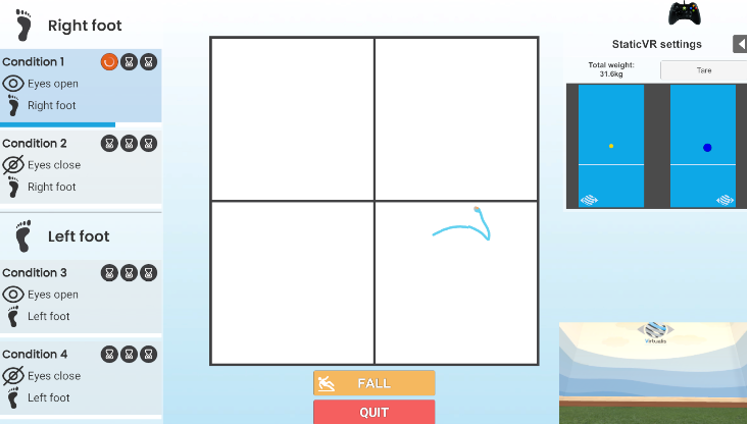
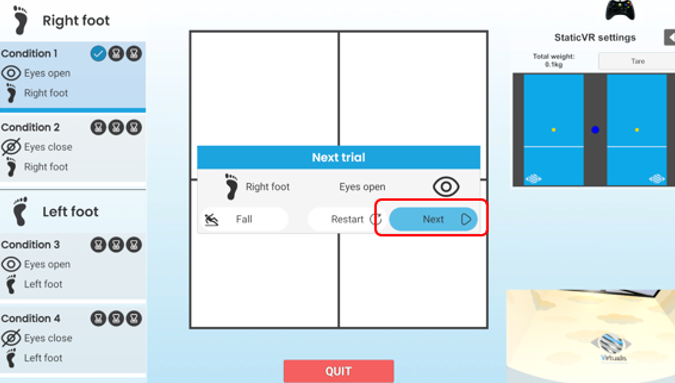
14. If the patient loses their balance, moves their arms, or places their left foot down, click “Fall.” This will stop the trial. Reposition the patient’s feet if needed before beginning the next trial.

15. Once ready to begin the second trial of condition 1, click “Next”.
16. Continue the assessment in the order provided on the screen. It is recommended to perform three trials of each condition:
- Condition 1: eyes open, right foot.
- Condition 2: eyes closed, right foot.
- Condition 3: eyes open, left foot.
- Condition 4: eyes closed, left foot.
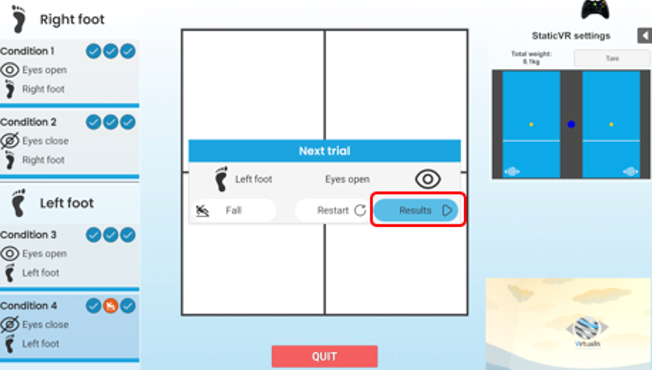
17. Once the assessment is complete, click on “Results.”
You can also view the results by clicking on the histogram icon on the main screen.
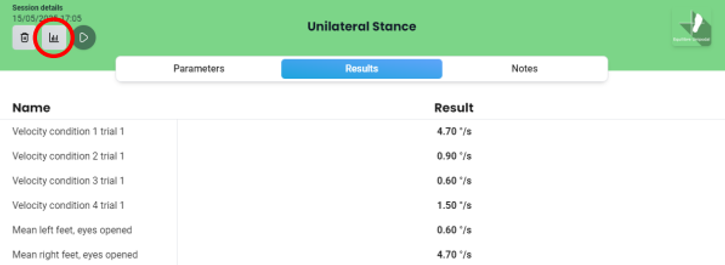
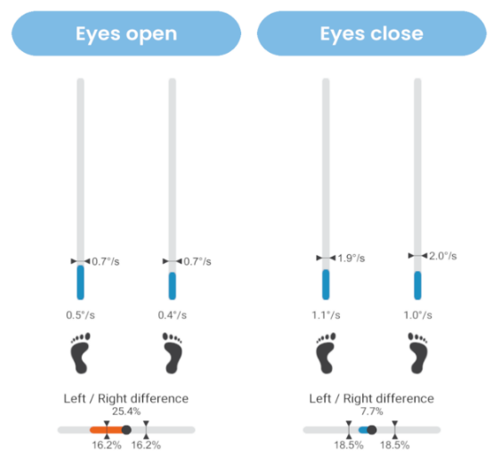
Default data points: mean sway velocities for each condition (degrees/second), percentage difference between left and right sides for eyes opened and eyes closed conditions (%).
Difference between left and right sides:
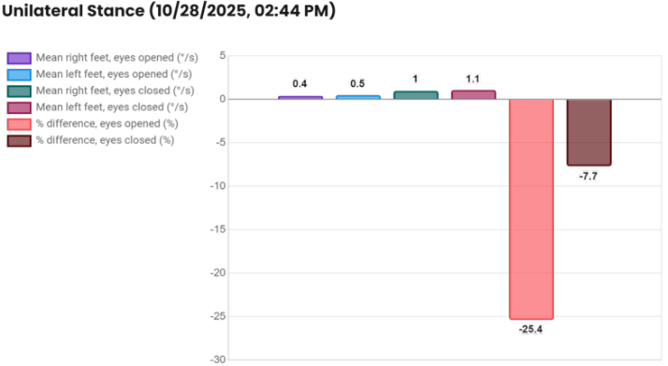
Bar graph:
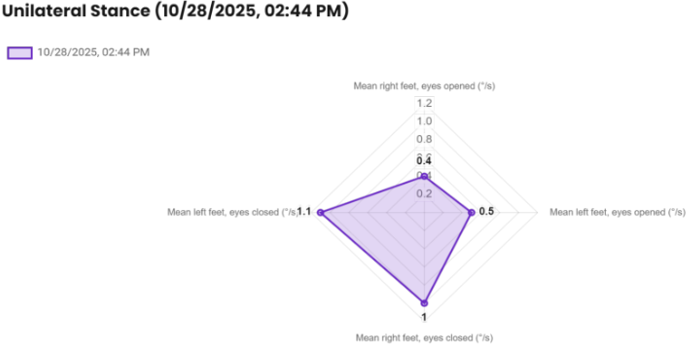
Radar plot:
You can add individual graphs to a PDF report by clicking on “Add to report” in the upper right corner of the screen. You also have the option to export results to a .csv file, which is located on the left side of the screen.
Presenter
