Callisto™ Support
Available Training
-
HIT440 Protocol Setup
-
VDB-Express Test
-
Keyboard Shortcuts
-
Acceptable Noise Level (ANL) Test
-
Speech in Noise (SIN) Test
-
Speech in Quiet (SIQ) Test
-
Visible Speech Mapping
-
REM440 Protocol Setup
-
Adult Hearing Aid Verification
-
TEN Test in AC440
-
Basic Audiometry
-
QuickSIN Test
-
Real-Ear-to-Coupler Difference
-
Print Reports
-
AC440 Protocol Setup
-
How to Verify Directional Hearing Aids
-
Verifying Ear Level FM Systems
-
Customized Printout Setup
-
How to perform FM transparency verification
-
Binaural Real Ear Measurements
-
BKB-SIN speech-in-noise test
-
How to perform frequency lowering verification
How to perform CROS and BiCROS fitting
This quick guide is intended to give a brief explanation on how to fit CROS and BiCROS type hearing aids.
How to perform CROS
1. Launch Affinity/Callisto Suite.
2. Ensure audiogram is entered.
3. Navigate to REM module.
4. Fitting prescription settings will automatically pop up, click ‘Okay’.
5. Ensure Monaural view is selected.
6. Ensure Response view is selected (Figure 1).
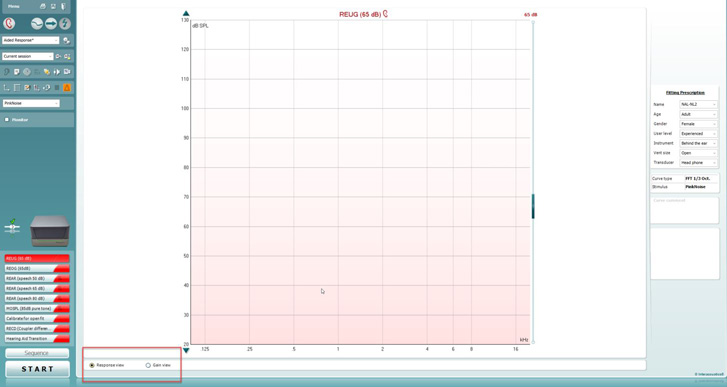
Figure 1: Selecting Response view.
7. Select CROS/BiCROS protocol.
8. Place both probe modules on patient, insert probe tube into better hearing ear.
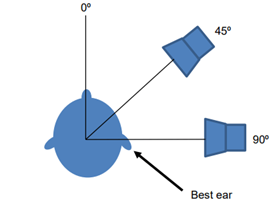
9. Position patient with speaker at either 45 or 90 degrees with better hearing ear facing the speaker (Figure 2).
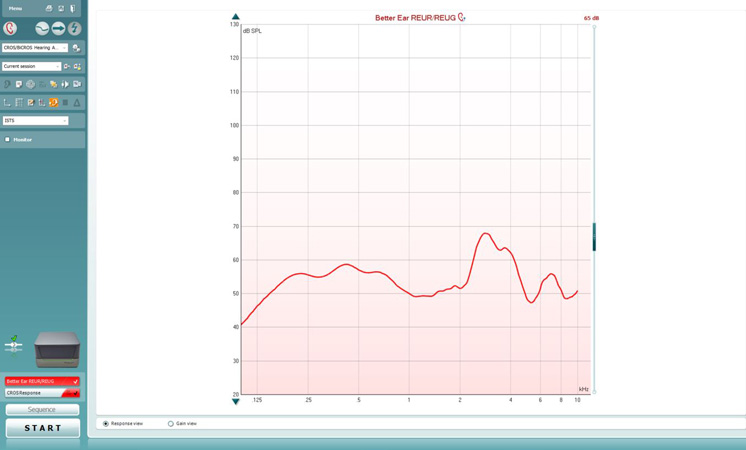
10. Run better ear REUR using desired stimulus (ISTS recommended) presented at a 65 dB level (Figure 3).
11. Select “use opposite reference mic” in Affinity Suite (orange icon in Figure 4).

Figure 4: Use opposite reference mic option.
12. Rotate patient 180 degrees (presenting to poorer ear) (Figure 5).
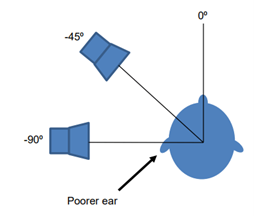
Figure 5: Patient with poorer ear facing the speaker.
13. Place CROS system on the patient, but off/muted.
14. Run CROS response using same stimulus parameters as above (Figure 6).
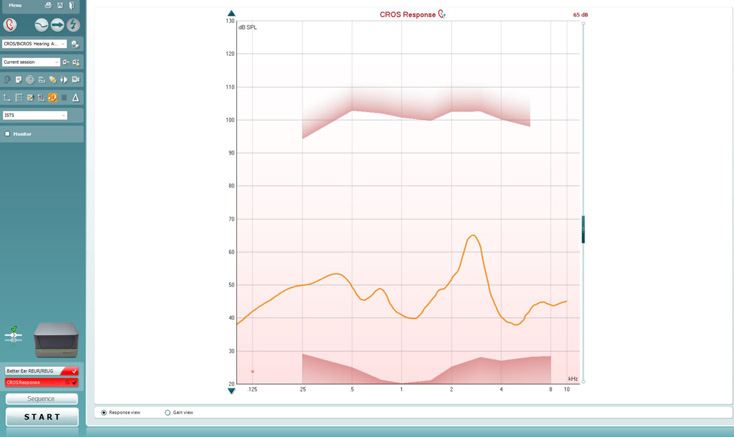
Figure 6: CROS response.
The difference between the better ear REUR and the CROS response lines is the head shadow.
15. Activate/unmute system and re-run CROS response using the same stimulus parameters (Figure 7).
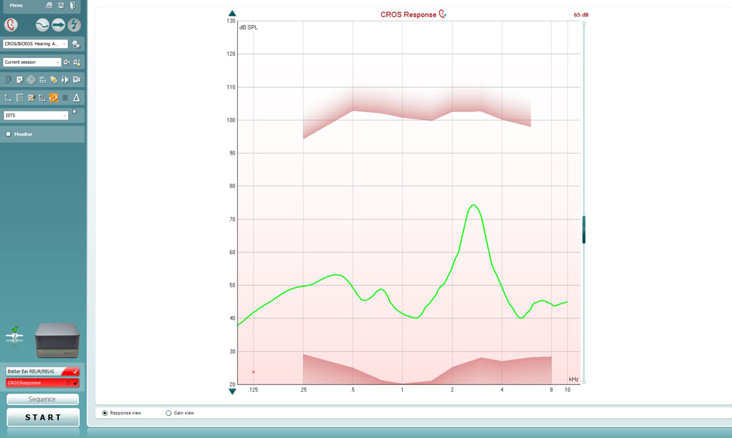
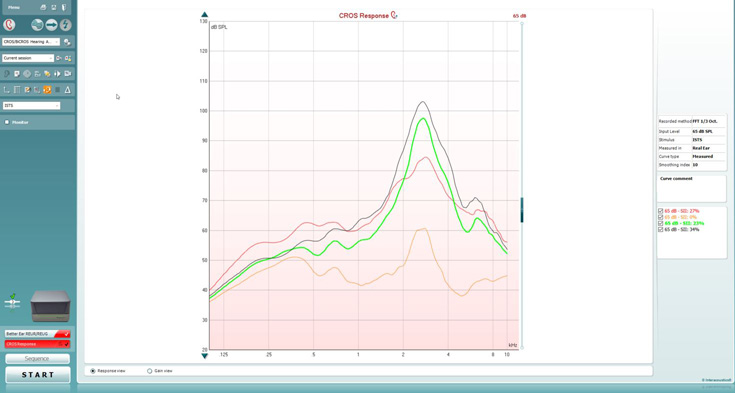
Examine the curves (Figure 8). If the CROS response curve with the CROS system turned ON is not similar to the better ear REUR curve, then adjust your CROS system if possible.
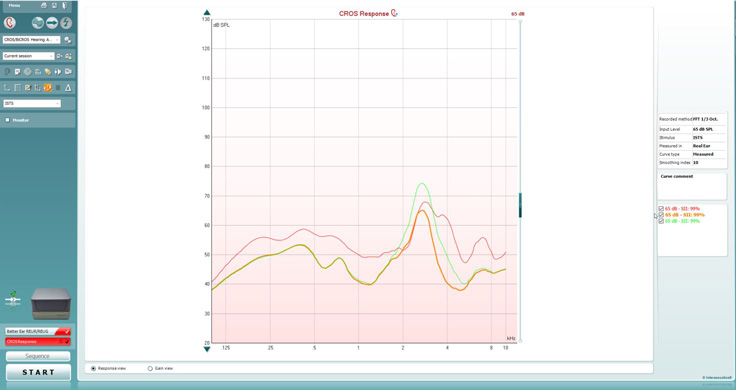
Figure 8: CROS responses compared to better ear REUR.
How to perform BiCROS
1. Launch Affinity/Callisto Suite.
2. Ensure audiogram is entered.
3. Navigate to REM module.
4. Proceed to ensure that your hearing aid on the better ear is fitted to target.
5. Once fitted to target, select CROS/BiCROS protocol.
6. Box will appear asking you to save changes, select your desired preference.
7. Ensure fitting prescription settings are the same – click ‘Okay’.
8. Ensure Response view and Monaural view are selected (Figure 9).

9. Place both probe modules on patient, insert probe tube into better hearing ear.
10. Position patient with speaker at either 45 or 90 degrees with better hearing ear facing the speaker (Figure 10).

11. Run the better ear REUR aided using desired stimulus (ISTS recommended) presented at a 65 dB level (Figure 11). It has to be a REUR measure but with hearing aids on.
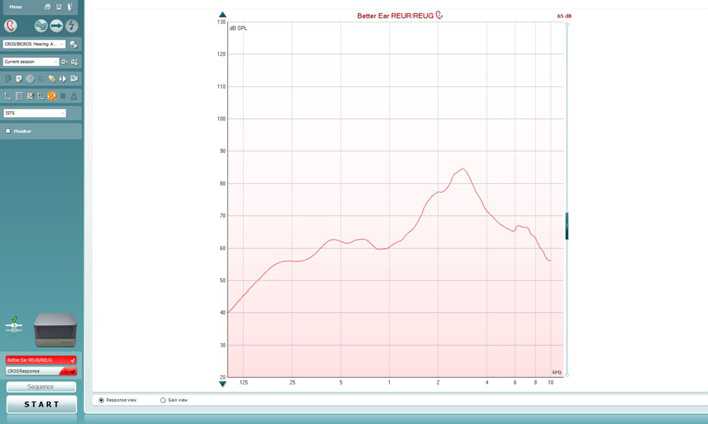
Figure 11: Better ear REUR.
12. Select “use opposite reference mic” in Affinity Suite (orange icon in Figure 12).

13. Rotate patient 180 degrees (presenting to poorer ear) (Figure 13).

14. Run CROS response using same stimulus parameters as above, CROS system in but off/muted (Figure 14).
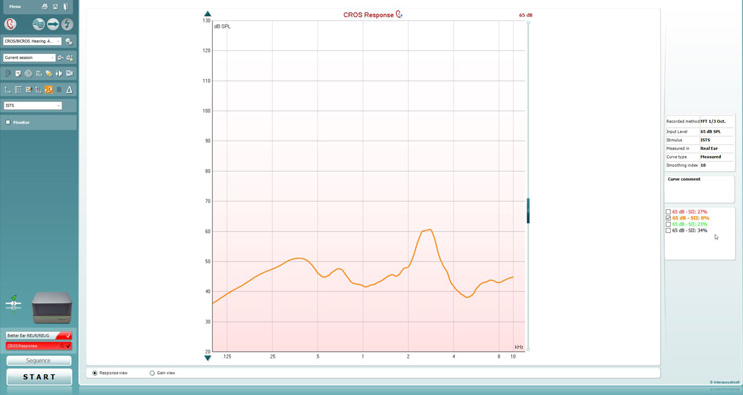
Figure 14: CROS response.
The difference between these lines is the head shadow.
15. Activate/unmute system and re-run CROS using the same stimulus parameters (Figure 15).
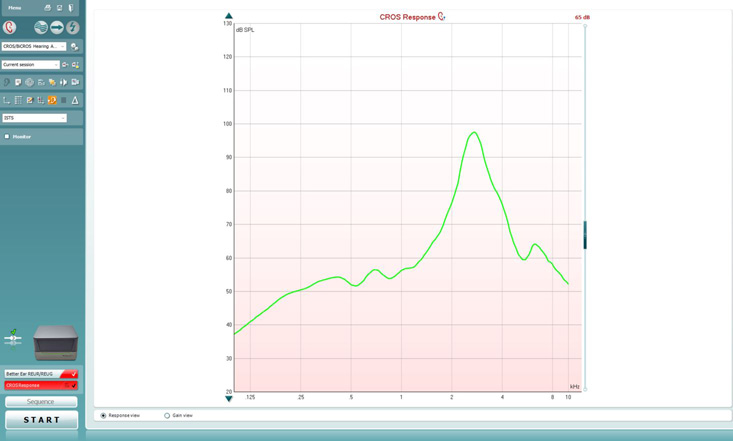
Figure 15: Re-run CROS response.
16. Examine curves – adjust CROS system accordingly (black curve is when CROS has been adjusted) (Figure 16).
