
How to perform the Cervical Range of Motion (ROM) assessment
This quick guide provides information on how to perform the Cervical Range of Motion (ROM) assessment on the Virtualis BalanceVR and PhysioVR solutions. For additional information, please refer to the Cervical Range of Motion user manual.
Equipment needed
To view equipment needed, click on the “i” icon in the upper right corner of the module.
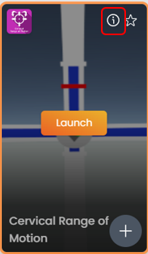
To perform Cervical ROM, you will need the VR headset and one hand controller.
Patient setup
To reduce compensatory motions beyond the cervical spine, the patient should be seated in a chair with a counter-hold applied to the shoulders by the tester.
Test procedure
1. Open a patient profile.
2. Click on “Start a session” to access the module list.
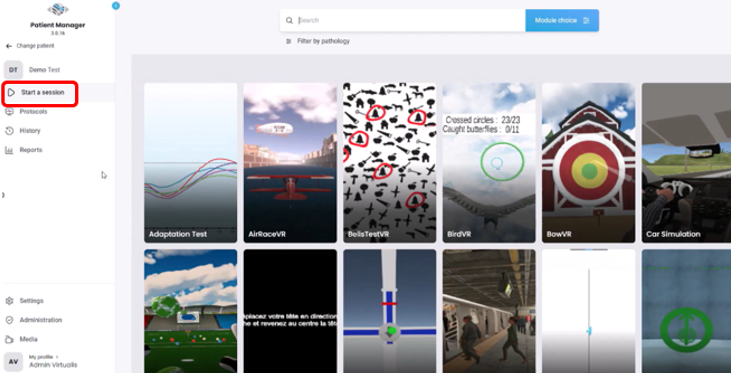
3. Type “Cervical Range of Motion” in the search bar. The first three letters are often enough.
4. Click on the Cervical Range of Motion button to launch the module.
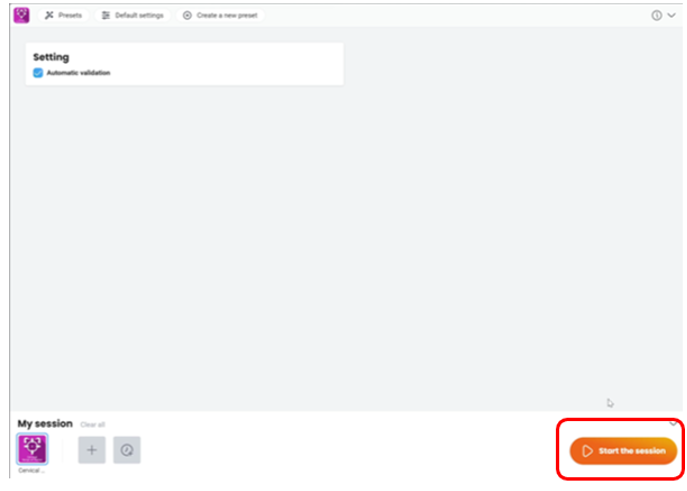
5. Select the ‘Automatic validation’ option if you would like the measurements to be automatically validated.

6. Next, click on “Start the session”.
7. Before beginning the assessment, instruct the patient to look straight forward, then press “Calibrate”.
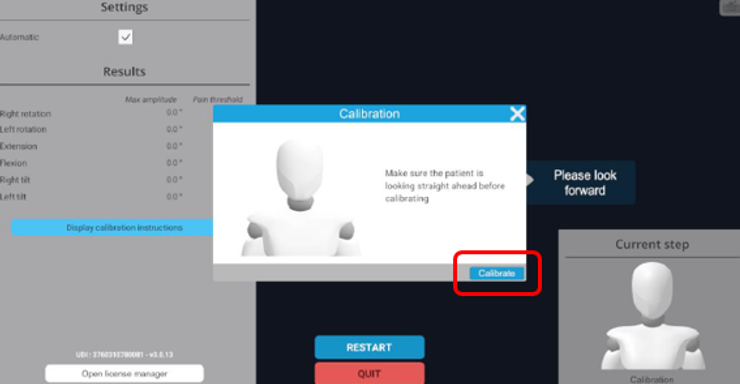
8. The VR headset will provide prompts that guide the patient in performing the intended movement.
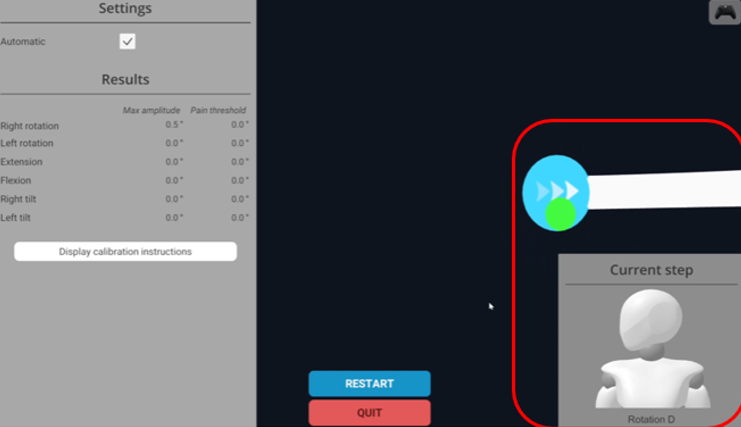
The movements are assessed in the following sequence:
- Right cervical rotation
- Left cervical rotation
- Cervical extension
- Cervical flexion
- Right cervical side bending
- Left cervical side bending
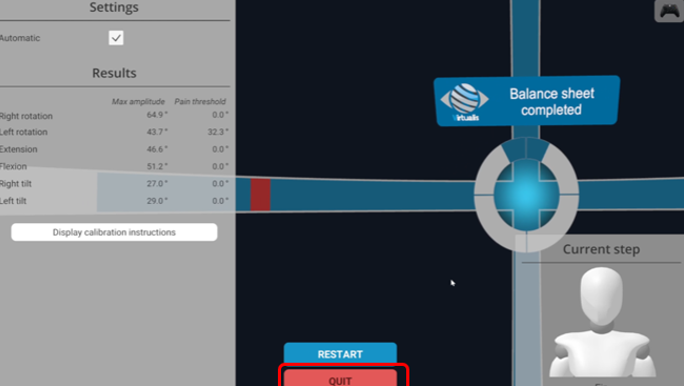
9. If the ‘Automatic validation’ setting was selected, the movements will be sequenced together. If it was not selected, you will need to press “enter” on the keyboard to move to the next movement.
10. There are two options to measure the patient’s pain threshold:
a. The patient holds one hand controller and presses the larger button on the top when they have pain. This is the preferred method for improved accuracy of pain threshold recording.
b. The clinician presses the “backspace” key on the keyboard when the patient reports pain.
11. When all six movements are recorded, press “Quit” to exit the module.
12. To view results, click on the graph icon at the top of the screen. Data points (in degrees) are provided for:
- Flexion
- Extension
- Right rotation
- Left rotation
- Right tilt
- Left tilt
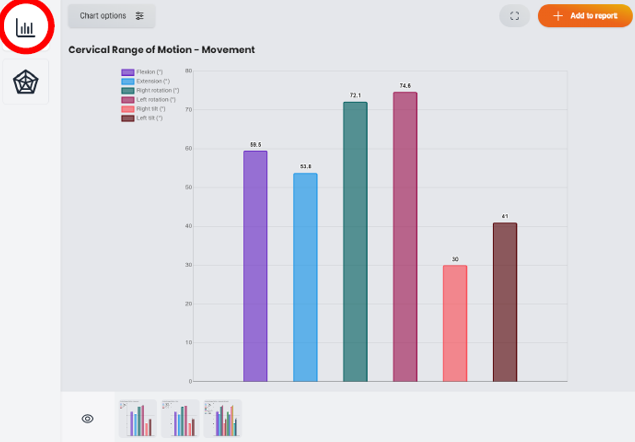
Bar graph
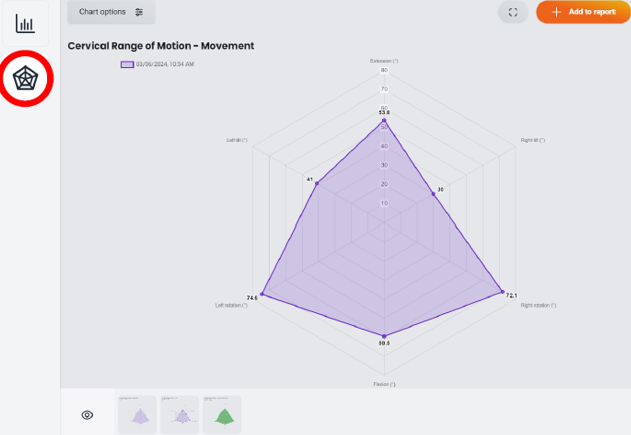
Radar plot
You can also add individual graphs to a report or export results to a .csv file.
Presenter
