
How to Perform the DVA Test Module
This quick guide provides information on how to perform the DVA Test module on the Virtualis BalanceVR and PhysioVR solutions. This quick guide follows the default module settings. For additional information, please reference the DVA Test user manual.
Equipment needed
To view the equipment needed, click on the “i” icon in the upper right corner of the module.
To perform the DVA Test module, you will need the DVA headband and 1 tracker. You will also need a ruler for initial configuration. Note: you must still have the VR headset and hand controllers powered on for module to run.
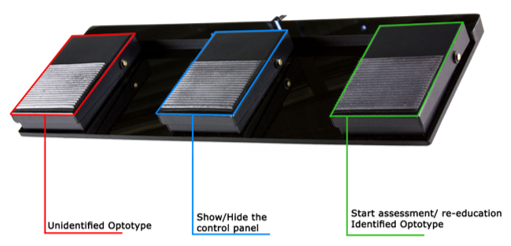
Optional accessories for the clinician include the Xbox controller or DVA footswitch pedal.
Patient setup
Depending on your goals, your patient can sit or stand to complete the tests. They must be positioned at least 1.5 meters away from the computer screen. Attach one tracker to the DVA headband and then place the headband on the patient’s head. Ensure the light of the tracker is directed towards the computer screen.
1. Open a patient profile
2. Click on “Start a session” to access the module list
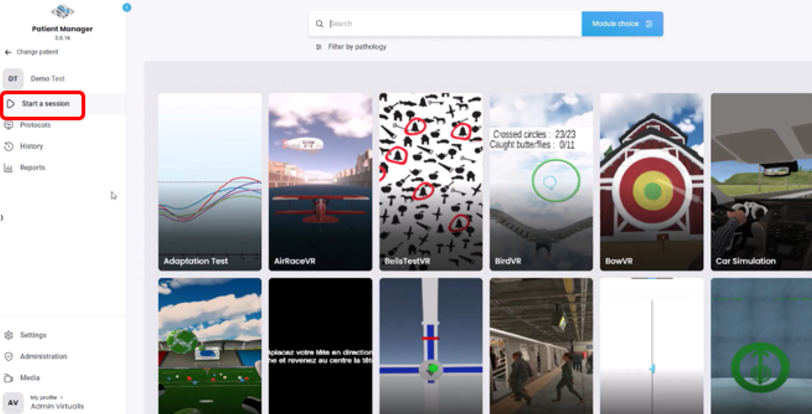
3. Type “DVA” in the search bar
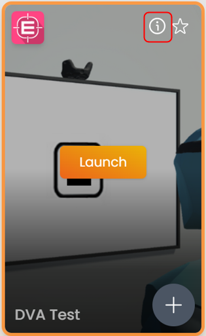
4. Click on the DVA Test button to launch the module
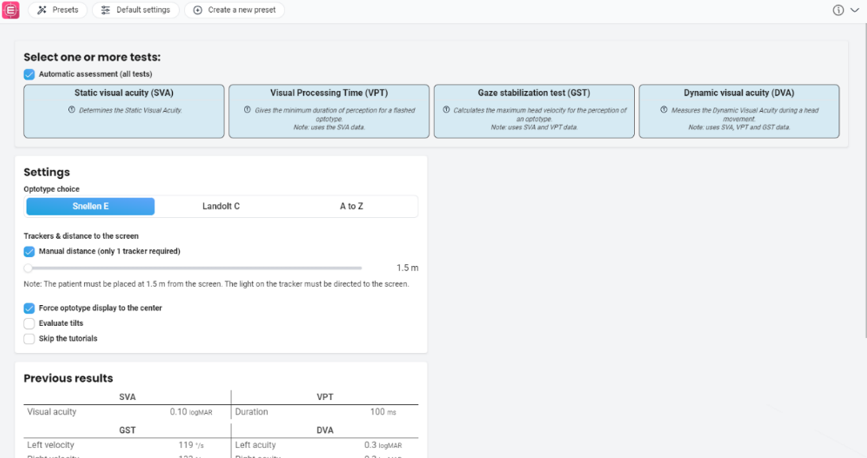
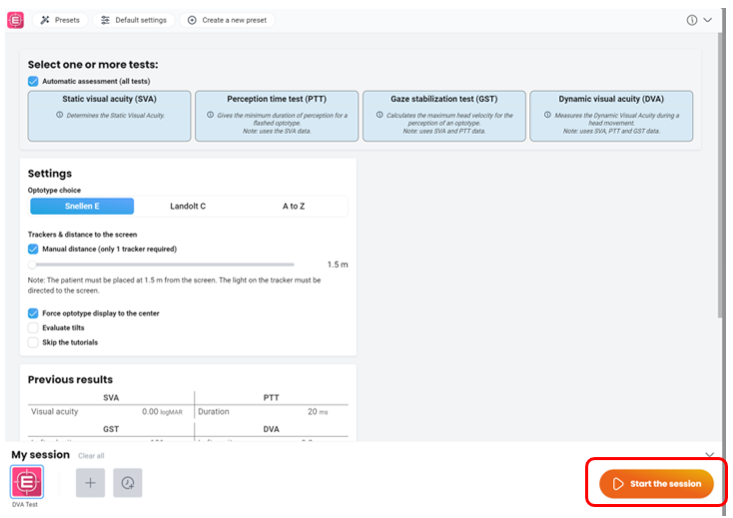
5. Next, select the intended settings
- Automatic assessment (default): when selected it chains all 4 tests together
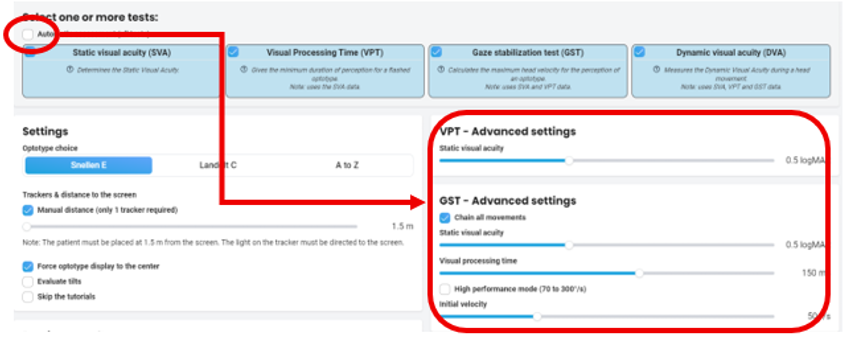
- Manual assessment: select individual tests to perform and advanced settings options. Note: review user manual for details on advanced setting options
- Settings
- Optotype choice: Snellen E (default option). The patient will say the direction the “E” is pointing (up, down, left, right)

-
- Trackers & distance to the screen: Manual distance (default option). The correct distance the patient is from the computer screen must be set

-
- Other: Force optotype display to the center (default option). The optotype will appear in the middle of the screen

6. Once settings are selected, press “Start the session” to launch the DVA Test module
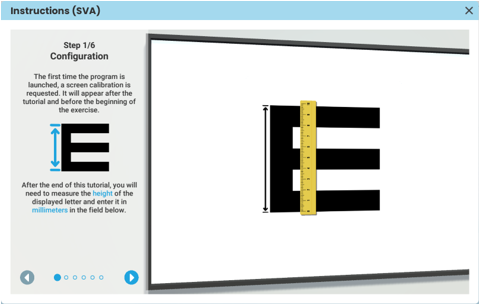
7. The tutorials will guide you through the tests. You can move through the tutorials by clicking on the arrows with the mouse or by using the left and right arrows on the keyboard. It is also possible to close the tutorials by clicking on the “x” in the top right corner of the screen
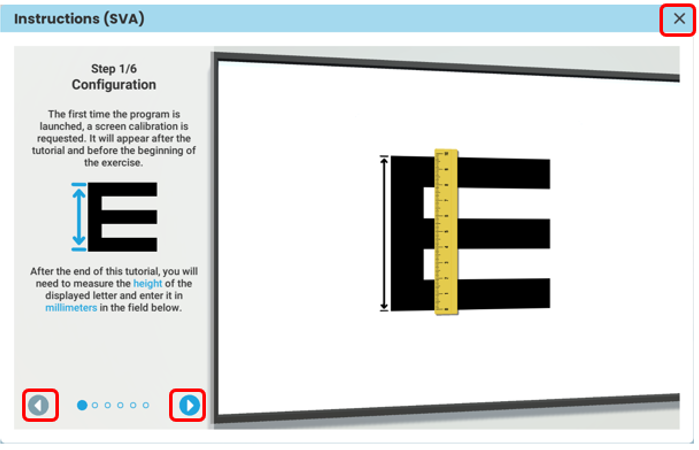
8. The first time you perform the DVA Test module, you must configure the screen and patient distance
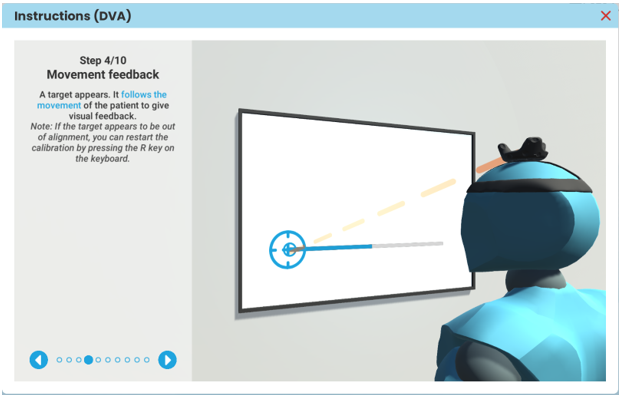
- Screen configuration: measure the size of the “E” on the computer screen to the nearest millimeter (mm) and input the value
- Patient distance configuration: instruct the patient to keep their head still and look at the target

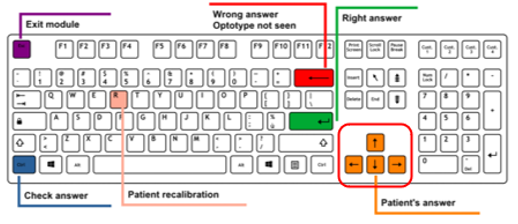
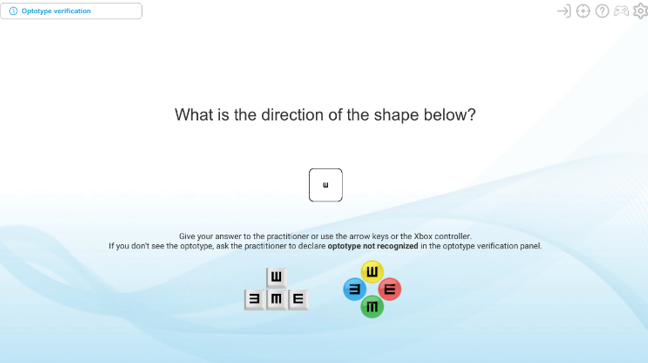
9. Instruct the patient that for all 4 tests, they will need to verbalize which way the “E” is pointing when they see it appear on the screen. The clinician must validate their patient’s response by selecting the appropriate key on the keyboard, Xbox controller or the DVA footswitch pedal.
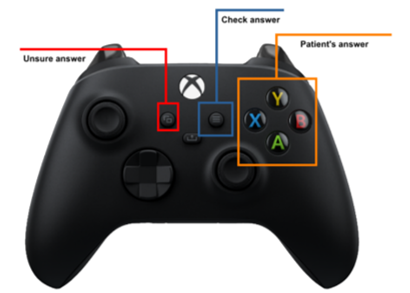
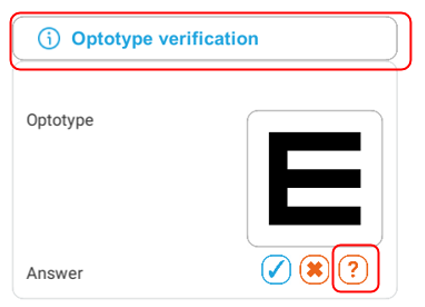
10. If the patient is unable to see the “E”, click on the “Optotype verification” button and click the “?” button
Understanding the action buttons on the screen
While the patient is performing the test, you have access to five action buttons on the screen. Their functions are reviewed below
- Abort test: this will stop the test. Note: no patient performance data will be saved

If you select this button, a popup window will appear to confirm and exit the test

- Recalibrate trackers: recalculate the distance between the tracker and the computer screen
![]()
- Display tutorial: review the test tutorial

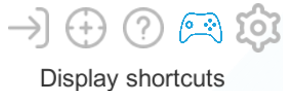
- Display shortcuts: view the clinician shortcuts for the Xbox controller, keyboard and DVA footswitch pedal
- Recalibrate screen: remeasure the size of the optotype using a ruler

Performing Static Visual Acuity (SVA)
Goal of test: assess the patient’s visual acuity while their head is still
1. After completing the patient set up by following the above listed tutorials, you can start SVA
2. Instruct the patient to look in the center of the white square and report which way the “E” is pointing. You will validate the patient’s answers using one of the shortcuts listed above
3. Click the “Calibrate & Start” button to begin the test
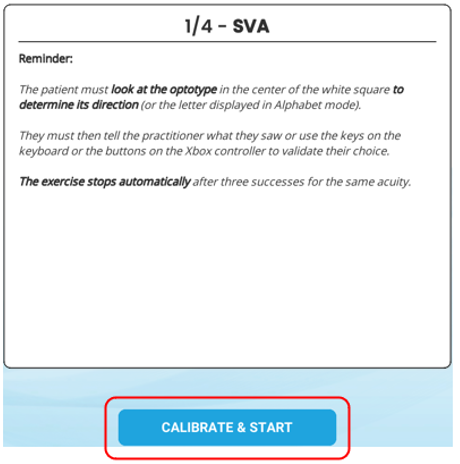
4. The test continues until the patient completes three successful responses for the same acuity
Performing Visual Processing Time (VPT)
Goal of test: assess how quickly the patient can identify a visual target
1. Instruct the patient to look in the center of the white square and report which way the “E” is pointing. You will validate the patient’s answers using one of the shortcuts listed above
2. Click the “Calibrate & Start” button to begin the test
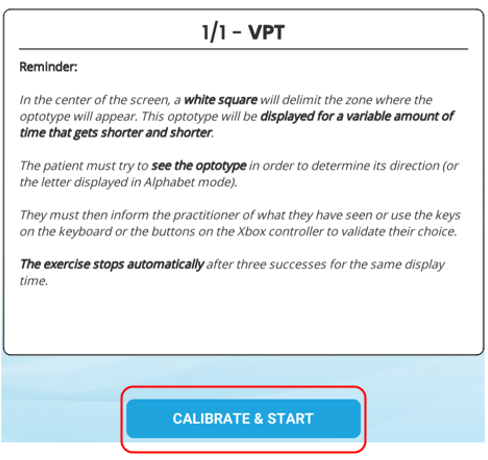
3. The test continues until the patient completes three successful responses for the same display time
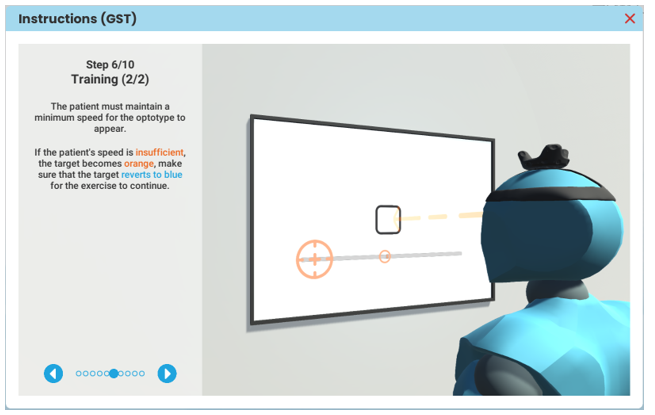
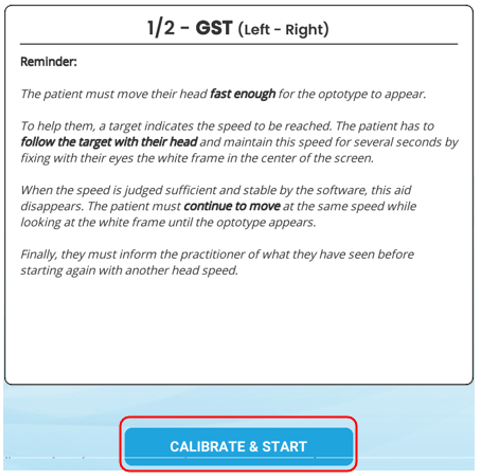
Performing Gaze Stabilization Test (GST)
Goal of test: assess the function of the vestibulo-ocular reflex (VOR) in horizontal and vertical planes of head movements at various speeds. You can perform this test with active or passive head movements
1. The GST begins with horizontal head movements
2. Following instructions in the tutorial, the patient will begin with a short training session. Instruct the patient to move their head at the speed of the sound while maintaining their vision in the middle of the white square. When they see the “E” appear, they will report which way it is pointing. Note: ensure the sound is broadcasted from the computer, not inside the VR headset

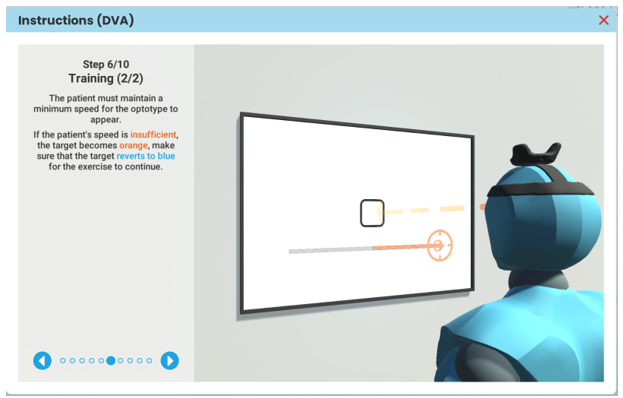
3. As the clinician, monitor the patient’s head speed by viewing the color of the target. If the target is blue, the patient is moving at the correct speed. If the target is orange, the speed is too slow
4. After the training session, you are ready to begin the GST. Click on the “Calibrate & Start” button to begin
5. Once the patient reports the direction the “E” is pointing, you must validate the patient’s answers using one of the shortcuts listed above
6. The test continues until the patient completes three successful responses for the same head speed
7. The patient will then perform the GST for vertical head movements
8. The test continues until the patient completes three successful responses for the same head speed
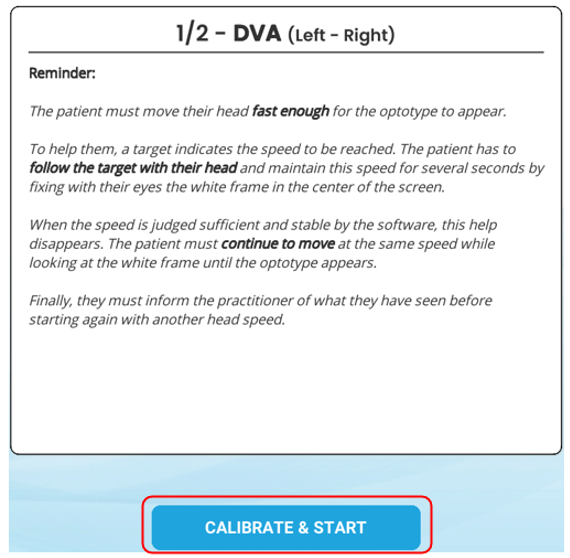
Performing Dynamic Visual Acuity (DVA)
Goal of test: assess gaze stability by comparing the visual acuity for when the head is still with the visual acuity for when the head is moving at a constant speed of 150 degrees per second. You can perform this test with active or passive head movements
1. The DVA begins with horizontal head movements
2. Following instructions in the tutorial, the patient will begin with a short training session. Instruct the patient to move their head at the speed of the sound while maintaining their vision in the middle of the white square. When they see the “E” appear, they will report which way it is pointing. Note: ensure the sound is broadcasted from the computer, not inside the VR headset
3. As the clinician, monitor the patient’s head speed by viewing the color of the target. If the target is blue, the patient is moving at the correct speed. If the target is orange, the speed is too slow
4. After the training session, you are ready to begin the DVA. Click on the “Calibrate & Start” button to begin
5. Once the patient reports the direction the “E” is pointing, you must validate the patient’s answers using one of the shortcuts listed above
6. The test continues until the patient completes three successful responses for the same optotype size
7. The patient will then perform the DVA for vertical head movements
8. The test continues until the patient completes three successful responses for the same optotype size
Results
Once the tests are completed, you can access the results
1. Click on the histogram icon
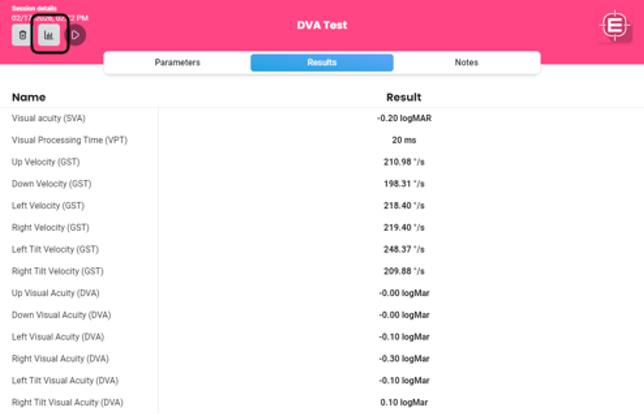
2. Default data points: SVA, VPT, GST: up, down, left and right velocities, DVA: up, down, left and right visual acuities
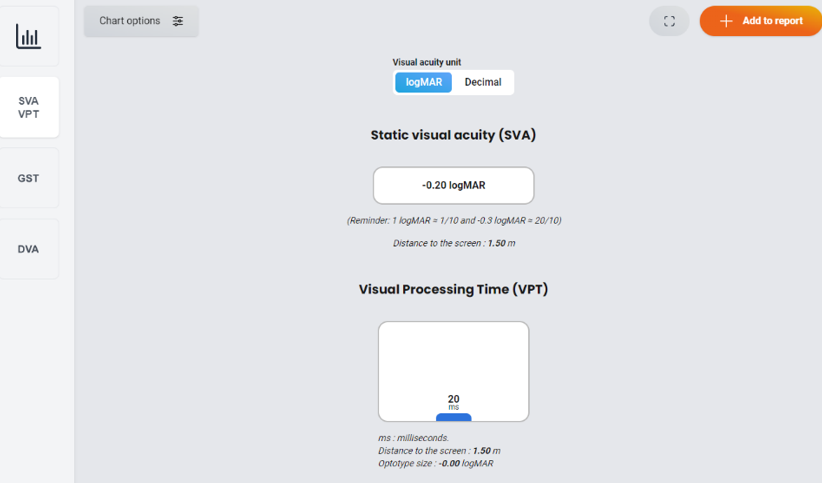
- SVA: reported in logMAR (default) or decimal, VPT: reported in milliseconds (ms)
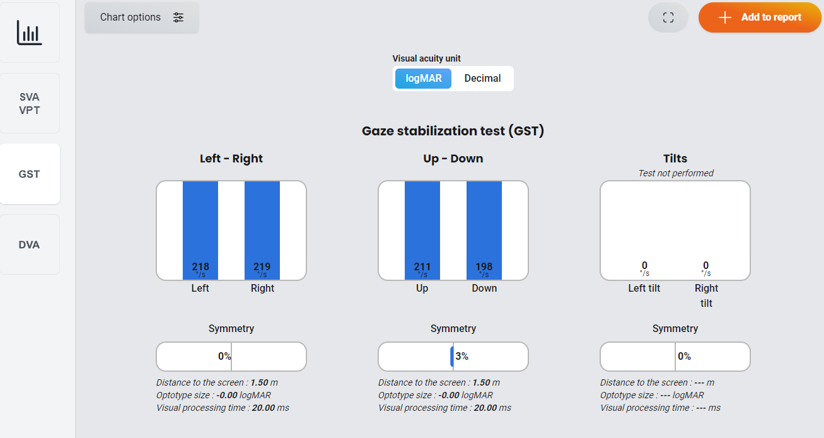
- GST: directions reported in degrees per second (°/s). Symmetry: difference between the two paired directions
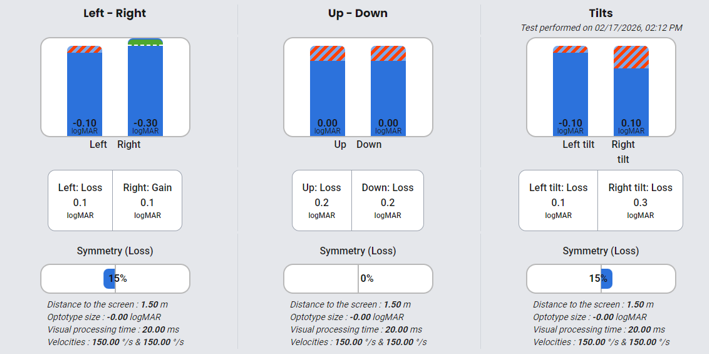
- DVA: directions reported in logMAR (default) or decimal
- Comparisons are shown between SVA and DVA: red/grey striped lines represent a loss in visual acuity, green solid bar represents a gain in visual acuity

-
- Symmetry: difference between the two paired directions
3. You can add individual graphs to a PDF report by clicking on “Add to report” in the upper right corner of the screen

4. You also have the option to export results to a .csv file which is located on the left side of the screen
Presenter
