
10 small but powerful VisualEyes™ 3.2 tips and tricks
In addition to larger updates such as brand-new tests, VisualEyes 3.2 also introduced a range of small but impactful updates designed to streamline workflows, enhance diagnostic confidence, and unlock new clinical insights.
While some improvements may seem subtle at first glance, they can make a meaningful difference in your day-to-day testing and interpretation.
Below, we’ll explore 10 small but powerful tips and tricks to help you get the most out of VisualEyes 3.2.
1. Automatic Test Start
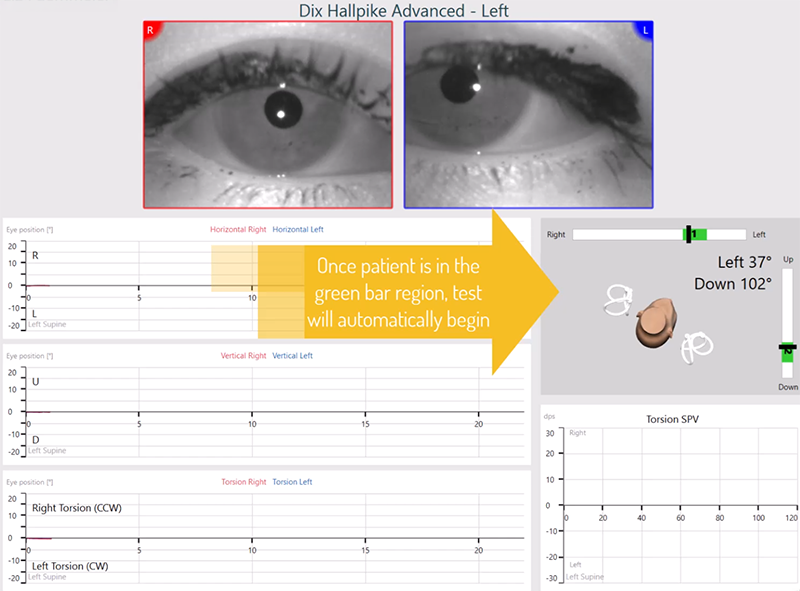
We have a new Automatic Test Start feature for our VORTEQ™ Assessments users in VisualEyes 3.2, allowing you to keep both hands on your patient during the Advanced Dix-Hallpike and Lateral Head Roll assessments.
The test will automatically start two seconds after the VORTEQ sensor registers that the patient is in the correct positioning (Figure 1).
If you do not want Automatic Test Start, you can always edit that yourself under Protocol Management. Go to VORTEQ Assessments, select your Advanced Dix-Hallpike or Lateral Head Roll, and disable it. This will give you the power of when you want to begin that test to make sure that the patient is truly in the correct position and safe position for you and them.
2. Adding cervical-ocular tests to your existing protocols
With the VisualEyes 525 package, VisualEyes 3.2 introduced the following cervical-ocular tests:
The purpose of these tests is to help you determine whether your patient’s neck or neck condition is contributing to abnormal eye movements observed during Gaze and Smooth Pursuit testing, respectively.
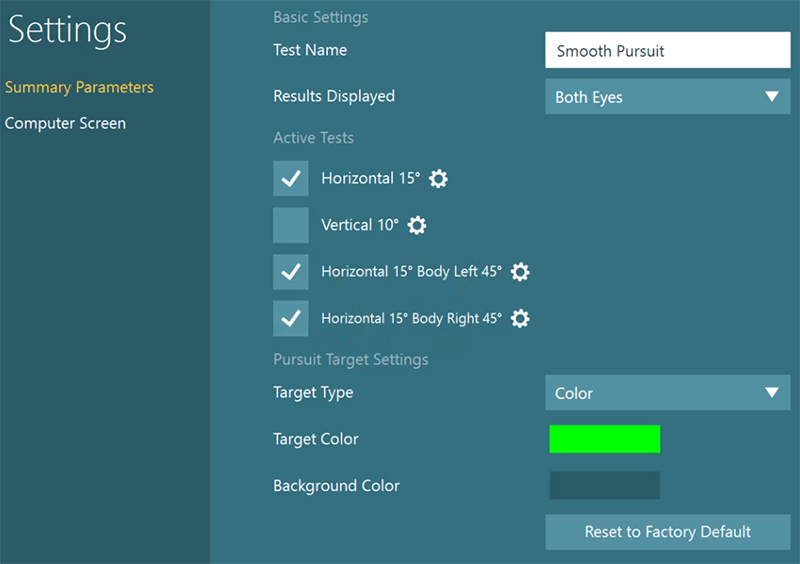
How to add: If you go to your VisualEyes 525 protocol and choose Gaze > Edit, all you have to do is select the body right and left positions to make sure it's added to your protocol. It's the same thing with Smooth Pursuit. Click Edit, and you can select all the tests you may want to include in Smooth Pursuit, including the body positions.
3. Keyboard shortcuts
Did you know VisualEyes 3.2 includes keyboard shortcuts to make your testing more efficient? Here are four must-know shortcuts to support your clinical flows (Table 1).
| Shortcut | Purpose |
| Enter | Instantly press the highlighted button (Start, Next, etc.). |
| Escape | Quickly cancel and reset a test if the patient isn’t ready. |
| M key | Add (stimulus) markers during testing (great for research!) |
| Spacebar | Select the “I don’t know” response in DVA, GST, or fvHIT™. |
Table 1: Must-know VisualEyes 3.2 shortcuts.
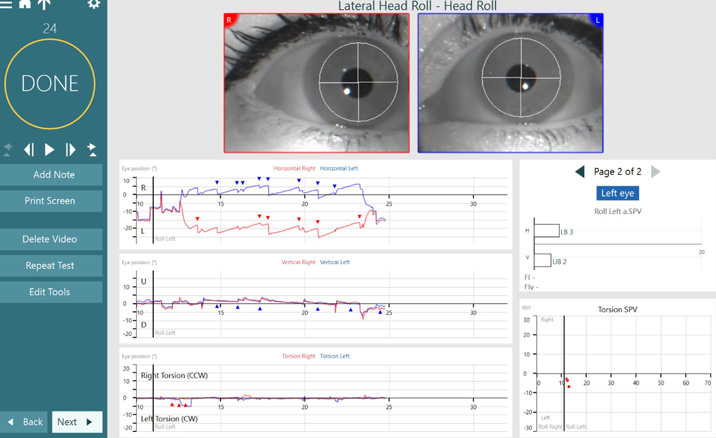
4. Torsional eye graphs in Lateral Head Roll testing
If you're using the Advanced Dix-Hallpike module in VORTEQ Assessments, you're already familiar with the power of torsional eye tracings. Now, that same information is available in the Lateral Head Roll module. This update is especially helpful for identifying torsion in patients with atypical anatomy or atypical BPPV presentations.
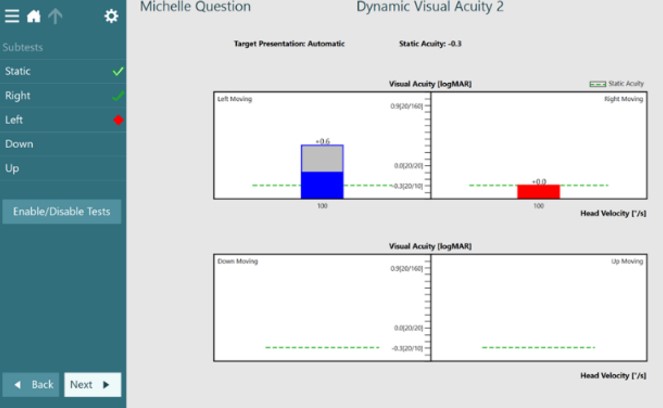
5. Dynamic Visual Acuity (DVA) graphing changes
To match the Gaze Stabilization Test (GST), we have implemented bar graphs for DVA testing. This makes it easier to compare DVA to GST results. When you add normative data to your system, you will see the ‘gray bars’ pop up on the results when the user performs outside of normal limits.
6. Normative data for Saccadometry
To help you interpret whether your patient’s Saccadometry results are normal or abnormal, we’ve collaborated with research partners to generate normative data. With VisualEyes 3.2, normative data for ages 18-69 years is now available in the software for reference during testing [1].
7. Pupillometry
We’ve switched the measurement parameter in the Pupil Diameter function from pixels to millimeters, offering more clinically useful information for Pupillometry.
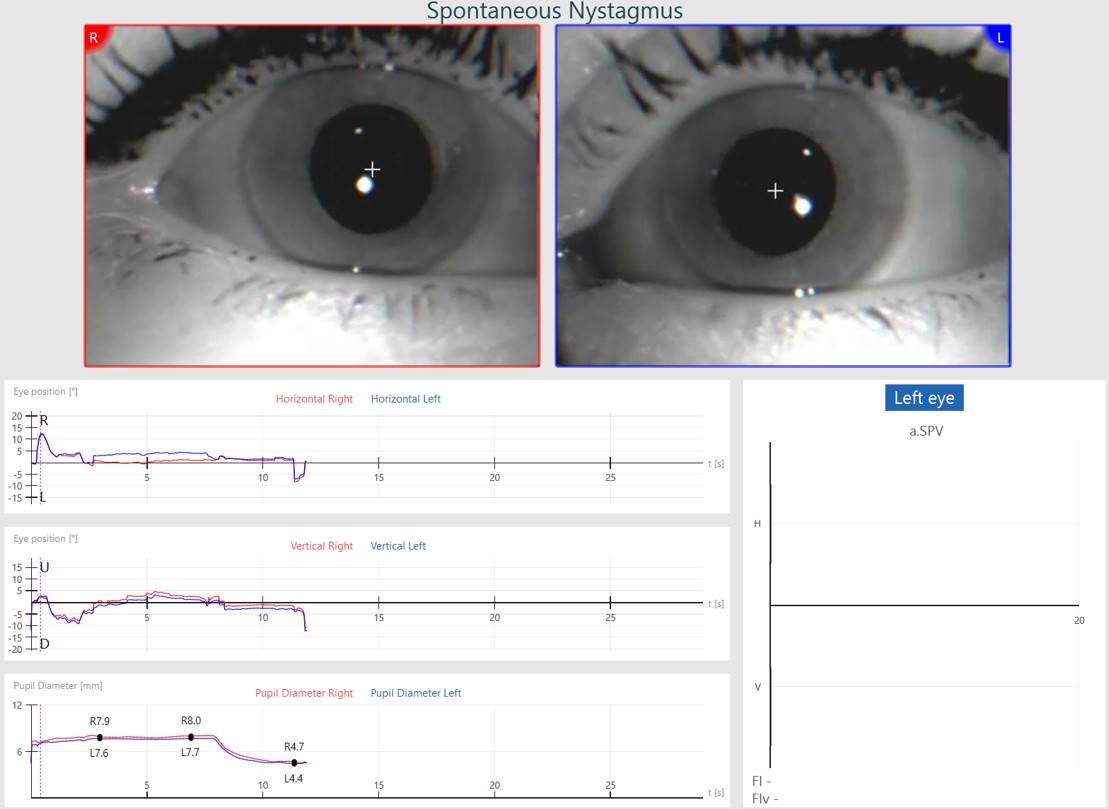
You can also click Edit Tools > ‘+’ sign to add points to the Pupil Diameter graph to get exact measurements of the left and right pupil sizes at any point during the recording. This information is included in the printed report and is also available in the data export with the Research Module.
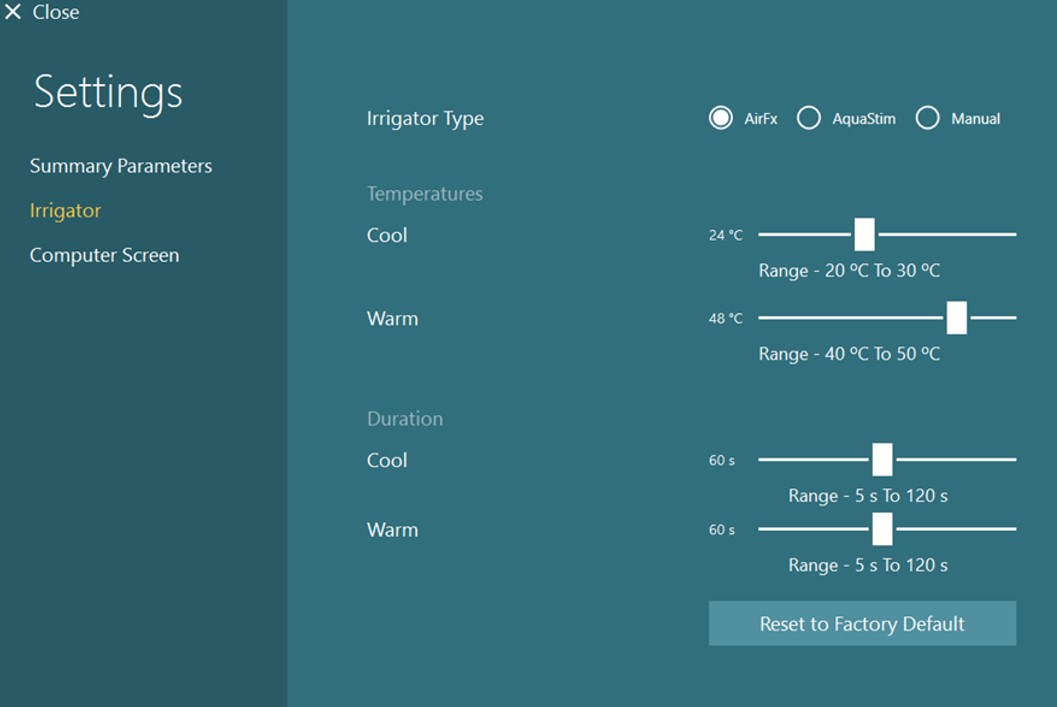
8. Adjust the duration of caloric irrigations for each temperature
In VisualEyes 3.2 (with the Research Module), you can now adjust the duration of each temperature for caloric testing. So, if you've ever wondered whether duration makes a difference, now you've got the ability to test it on your research subjects so that you can better serve your patients in the clinic.
9. Self-Paced Saccades
With the VisualEyes 525 package, VisualEyes 3.2 introduced the Self-Paced Saccade test, which is an advanced oculomotor test that relies on the patient making voluntary and volitional saccades between two fixed stimulus dots in 30 seconds.
With previous research indicating that patients with central dysfunction, such as a head trauma or neurodegenerative disorder, would have a lower number of total saccades than those without dysfunction, Self-Paced Saccades can provide extra evidence of central dysfunction.
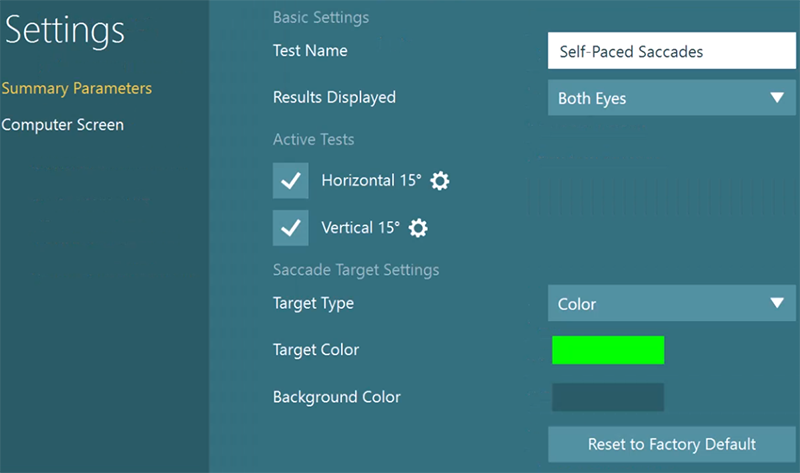
But did you know that in addition to performing the Self-Paced Saccade test in the horizontal axis, you can also do it vertically?
How to add: Go to Protocol Management, choose your protocol, and find Self-Paced Saccades. Expand it to see what tests you currently have selected. If you only have horizontal, all you need to do is click Edit Test and make sure that vertical is selected.
10. Visual Processing Time (VPT) testing
We’ve added the VPT test as a complementary baseline test to Static Visual Acuity (SVA) for the following functional VOR protocols:
- DVA
- GST
- Functional Vision Head Impulse Test (fvHIT)
VPT measures the fastest optotype your patient can accurately see, and if you perform two or all three of the above tests, you can copy the results without having to repeat the VPT test.
Unlocking more value from VisualEyes 3.2
These tips and tricks highlight just some of the ways you can enhance your clinical efficiency and gain deeper insights from your vestibular assessments. To explore all capabilities in more detail, discover what VisualEyes 3.2 can do for your clinic.
References
[1] Demian, D., Petrak, M., Zielinski, G., Massingale, S., Alexander, A., Fuemmeler, L., & Lin, C. C. (2023). Clinical Saccadometry: Establishing Evaluative Standards Using a Simplified Video Oculography Protocol in the Adult Population. Journal of the American Academy of Audiology, 34(1-02), 19–27.